In the north, many people make full use of what nature provides: they hunt and fish for food, and make clothing and practical items out of the skin and fur of animals. Over the years, I have amassed a collection of gloves and mittens, none of which has been able to keep my fingers from freezing when winter arrives.
Two winters ago, I capitulated and bought the ridiculously expensive Canada Goose mittens, after being advised by many outdoor-loving friends that goose-down was the best thing since sliced bread. It was guaranteed to trap the heat from my fingers and keep them warm, was the promise. That might well be so – with other people’s fingers. As well-meaning as my friends are, I am all too aware that their advice is based on the erroneous assumption that there is heat in my fingers to be trapped in the first place. To date, I have come across no gloves or mittens – and I have tried many different kinds – that can keep my hands warm even during a Toronto winter, let alone a Yellowknife winter.
This Fall, I decided to do things northern-style and make my own mittens, out of sealskin. Some people reacted with the horror when I mentioned it, given the negative publicity over the killing of seals. However, this is a way of life in the north, which I see as no different from slaughtering cows for meat and using their hides for leather goods. I signed up for a class where all materials were provided, because I’m not generally a fan of crafts and sewing, so it’s highly unlikely that I would utilize any extra supplies. There were 6 of us in the class.
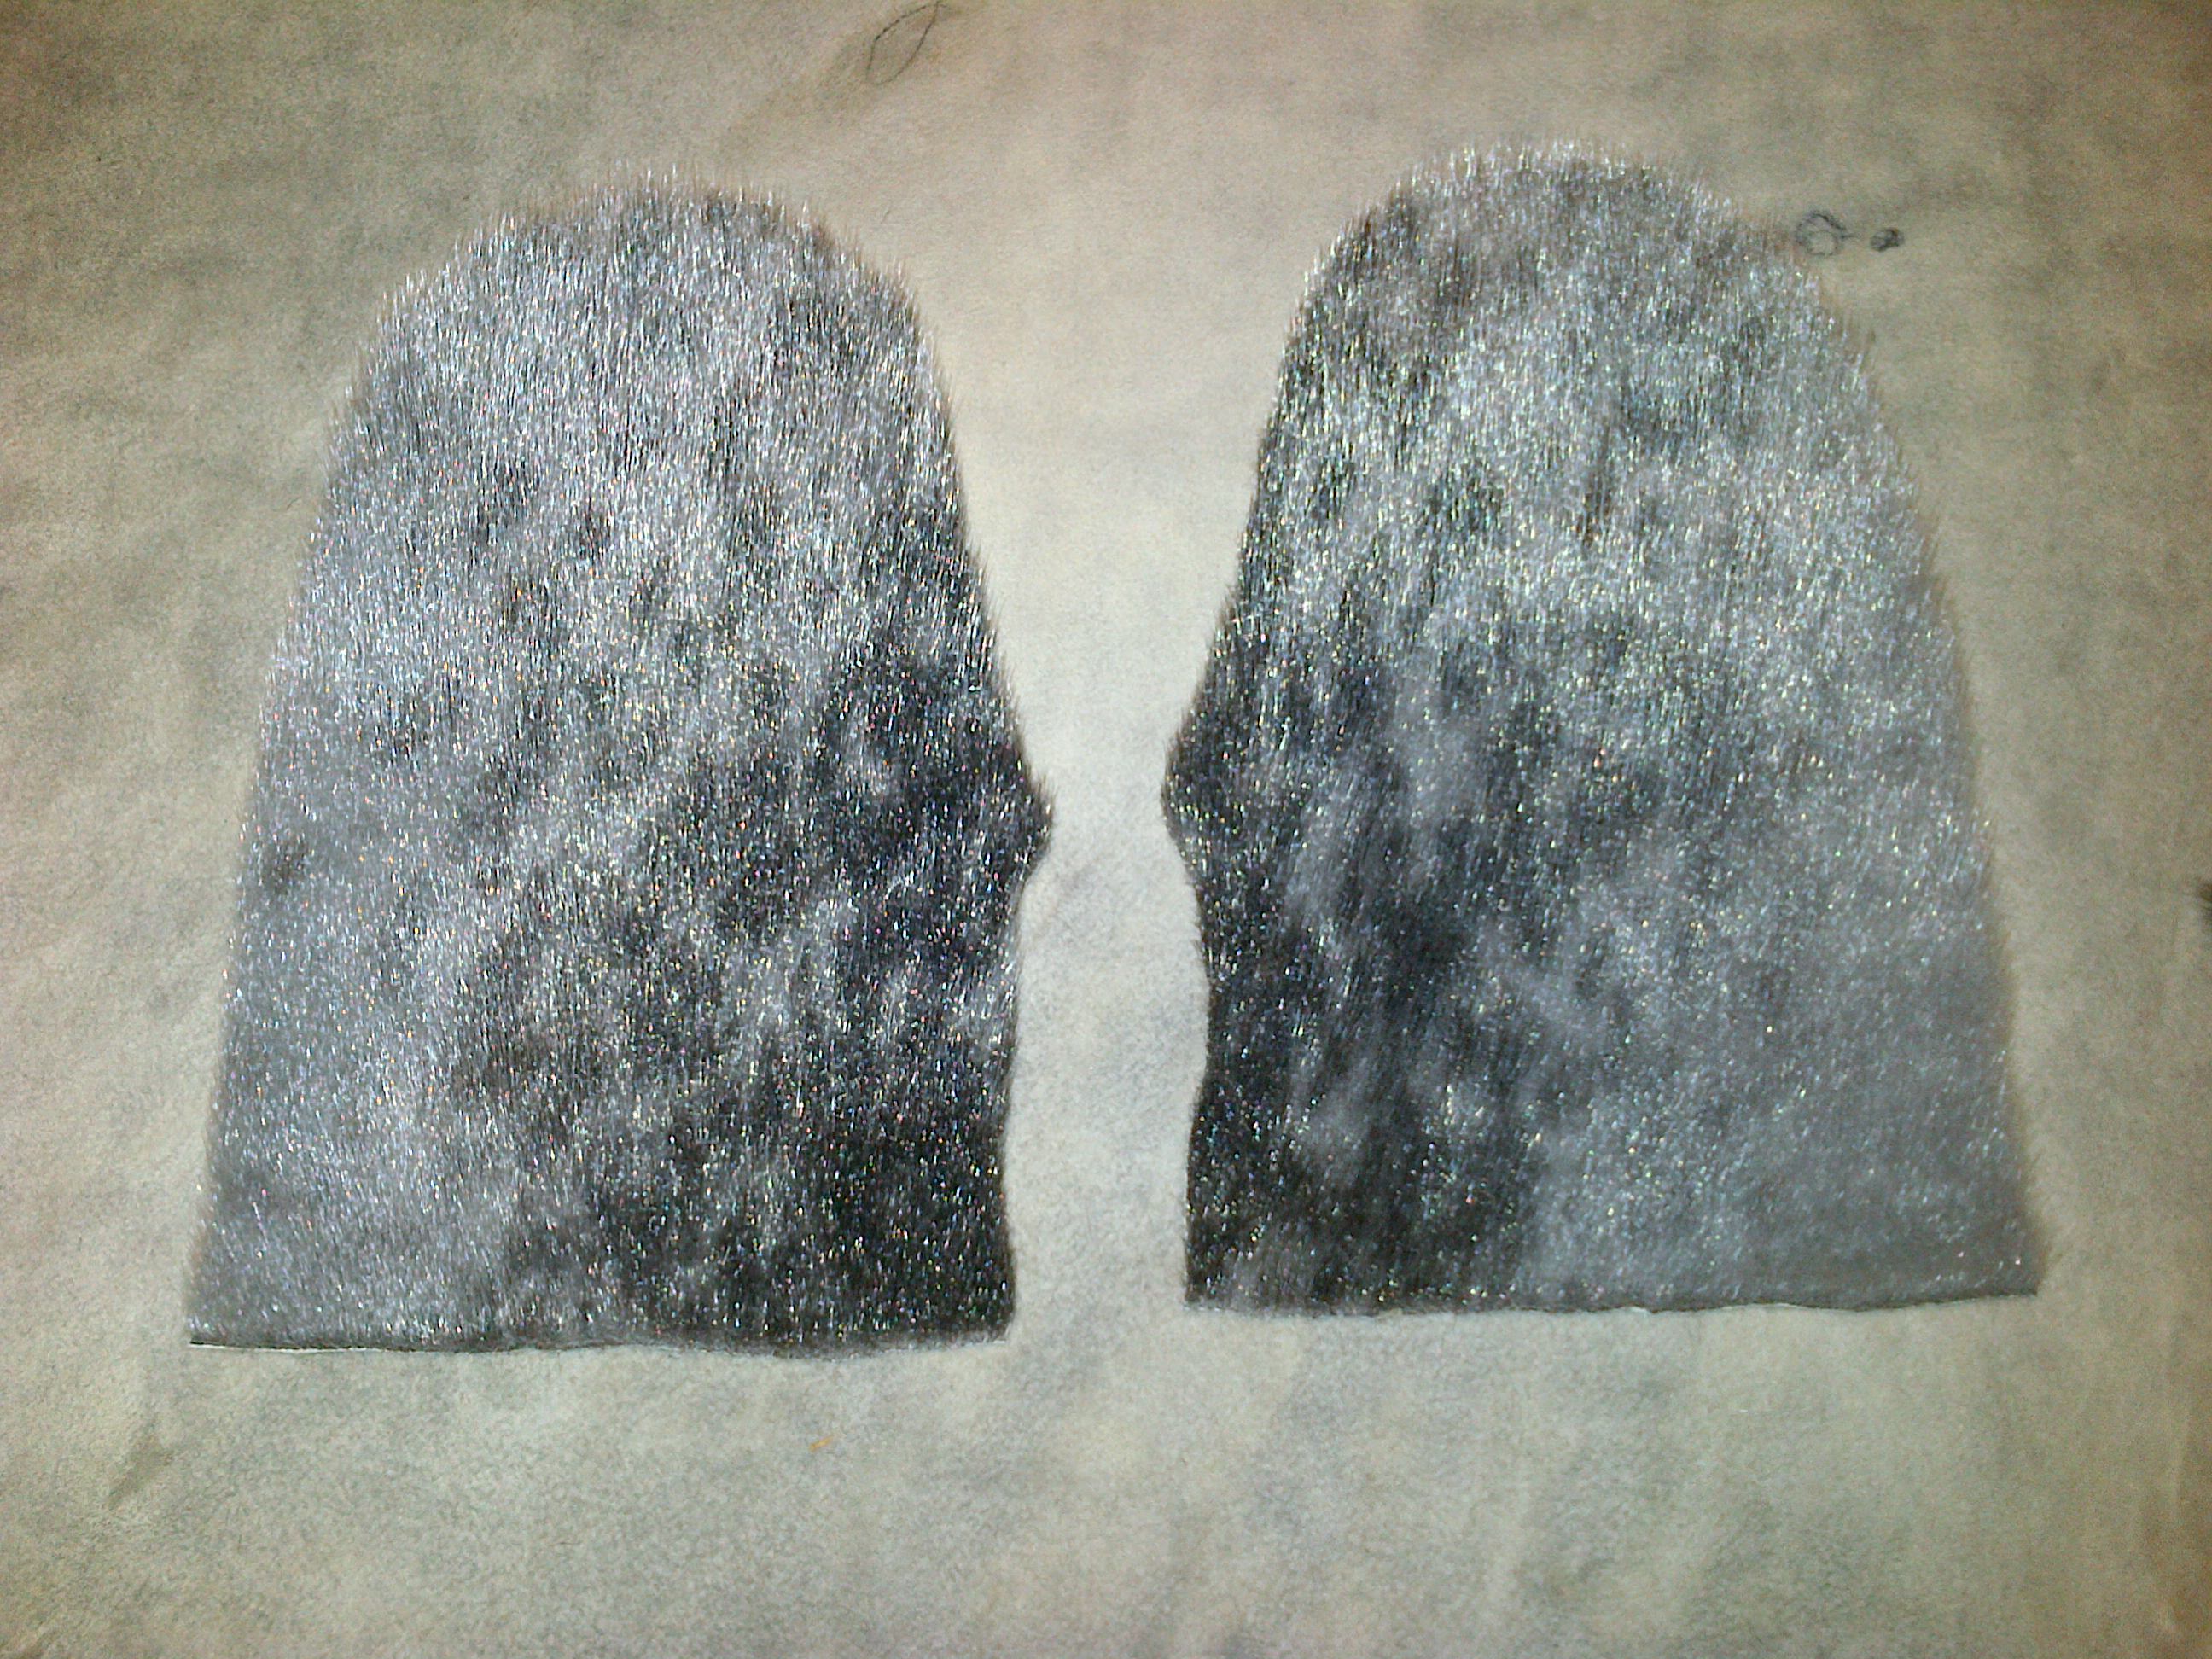
The first thing we did was to choose the pattern that fit our hand size, then choose a seal pelt and trace and cut out the pattern. I was surprised at the variation in the fur of the pelts. Some of it was dark grey, some a lighter shade of grey, with spots in shades of brownish-black, and there was one that was completely black. All of the fur had a healthy gloss. The thickness of the pelts varied, evidently due to the season in which the animal had been caught.

Sealskin before cutting
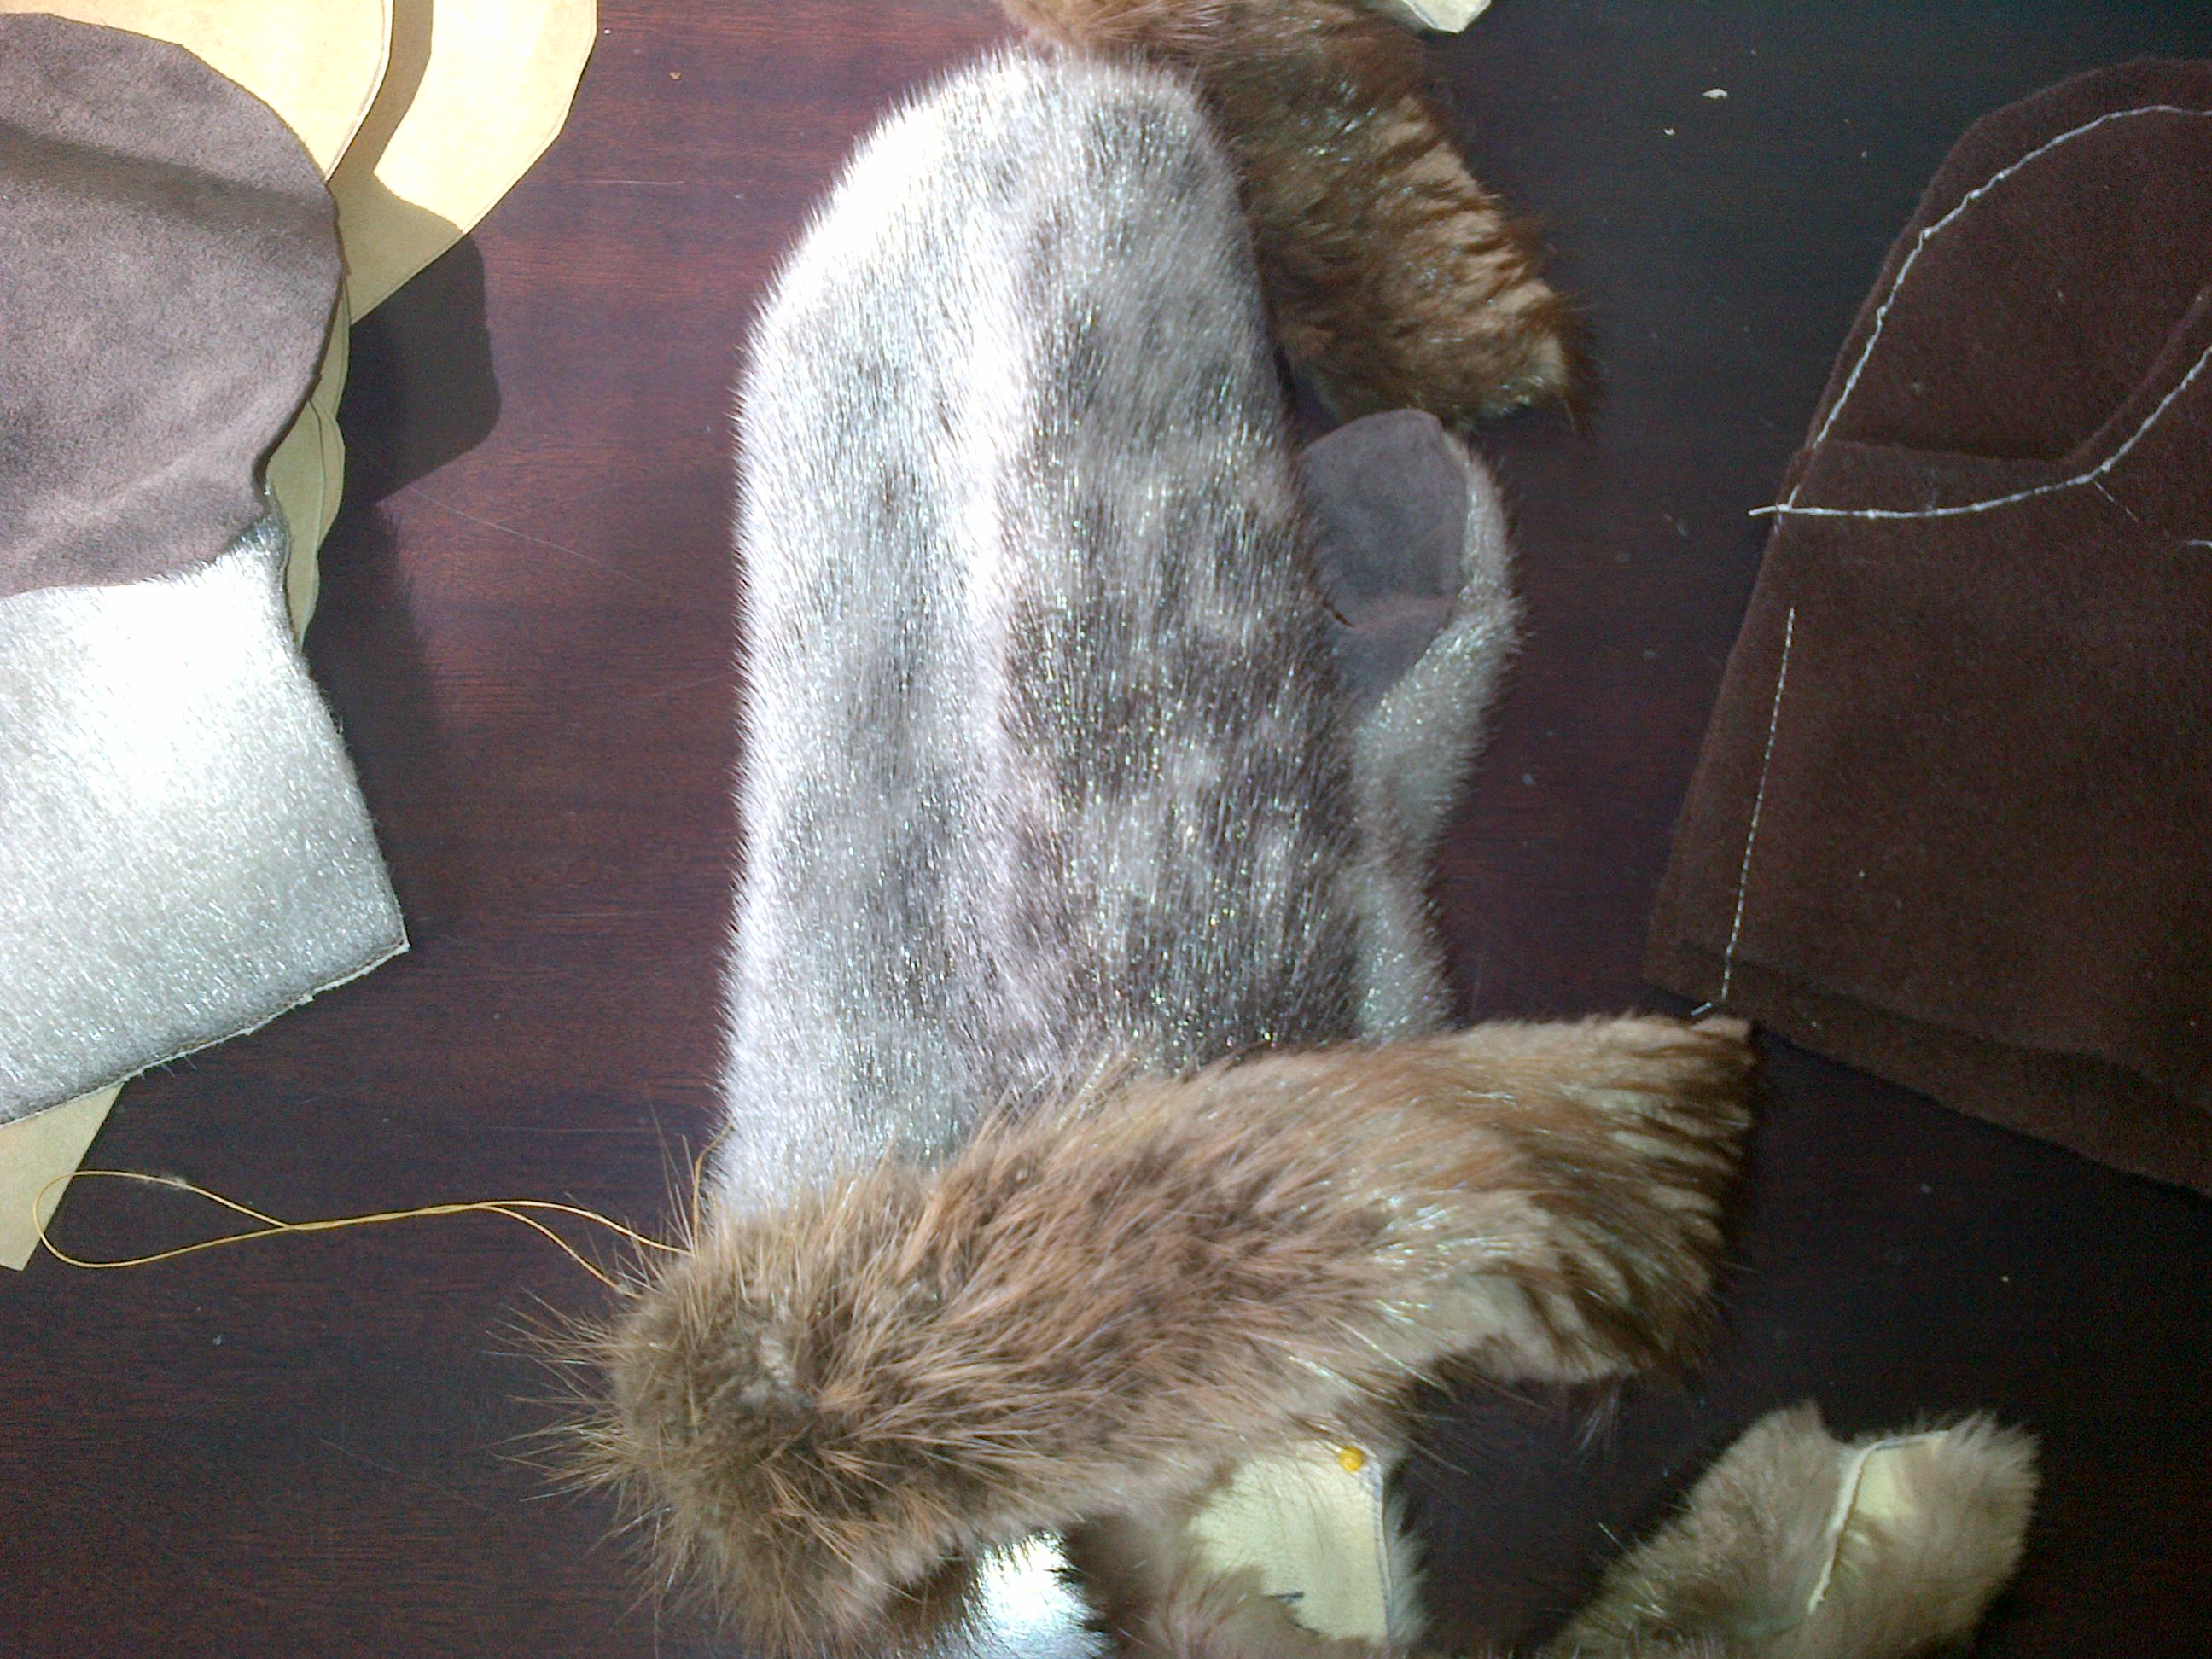
We had to first fit the patterns on the fur side of the pelt, to ensure that we avoided any missing fur or other imperfections. As with humans, sealskins carry evidence of injury or trauma suffered by the animal during its lifetime. The pattern had to be traced on the back side of the pelt, and we cut it with a very sharp craft knife. We had to cut according to the direction of the fur, based on the intended use of the mittens. If the mittens were to be used for walking around town, the fur should point toward the ground, so that any snow would fall off. But if they were to be used for an outdoor activity such as snowmobiling, the fur should point towards the body, i.e. as the wind would blow it.
Sealskin mitten cut-outs
Next we had to cut out the liners of the mittens, made of duffle, in exactly the same pattern pieces. Then we stitched the pieces of sealskin together, creating the shape of the mitten. The truly old-fashioned way would have been to stitch them with animal sinew. However, we used artificial sinew, which is at least as strong as the natural kind. Once the outer mitten was completed, we then stitched together the pieces of the liner, this time on a sewing machine with regular thread. The liner stitching was a few millimetres from the edge, so that it would be a bit more narrow and more easily fit inside the sealskin outer layer of the mitten. After creating 2 left-hand liners and having to undo one, I learned that it was better to ensure that the pieces were mirror images before stitching.
Finally, we added a cuff of beaver fur. The fur on sealskin is a flat fur, if there is such a term. It’s like a carpet, whereas beaver fur stands up more, hence the reason that it was placed at the cuff, to keep the cold air out. It was a bit more difficult to sew the beaver fur on, because the long hairs kept getting in the way and had to be constantly flattened. By the end of the class, I managed to finish one mitten…almost.
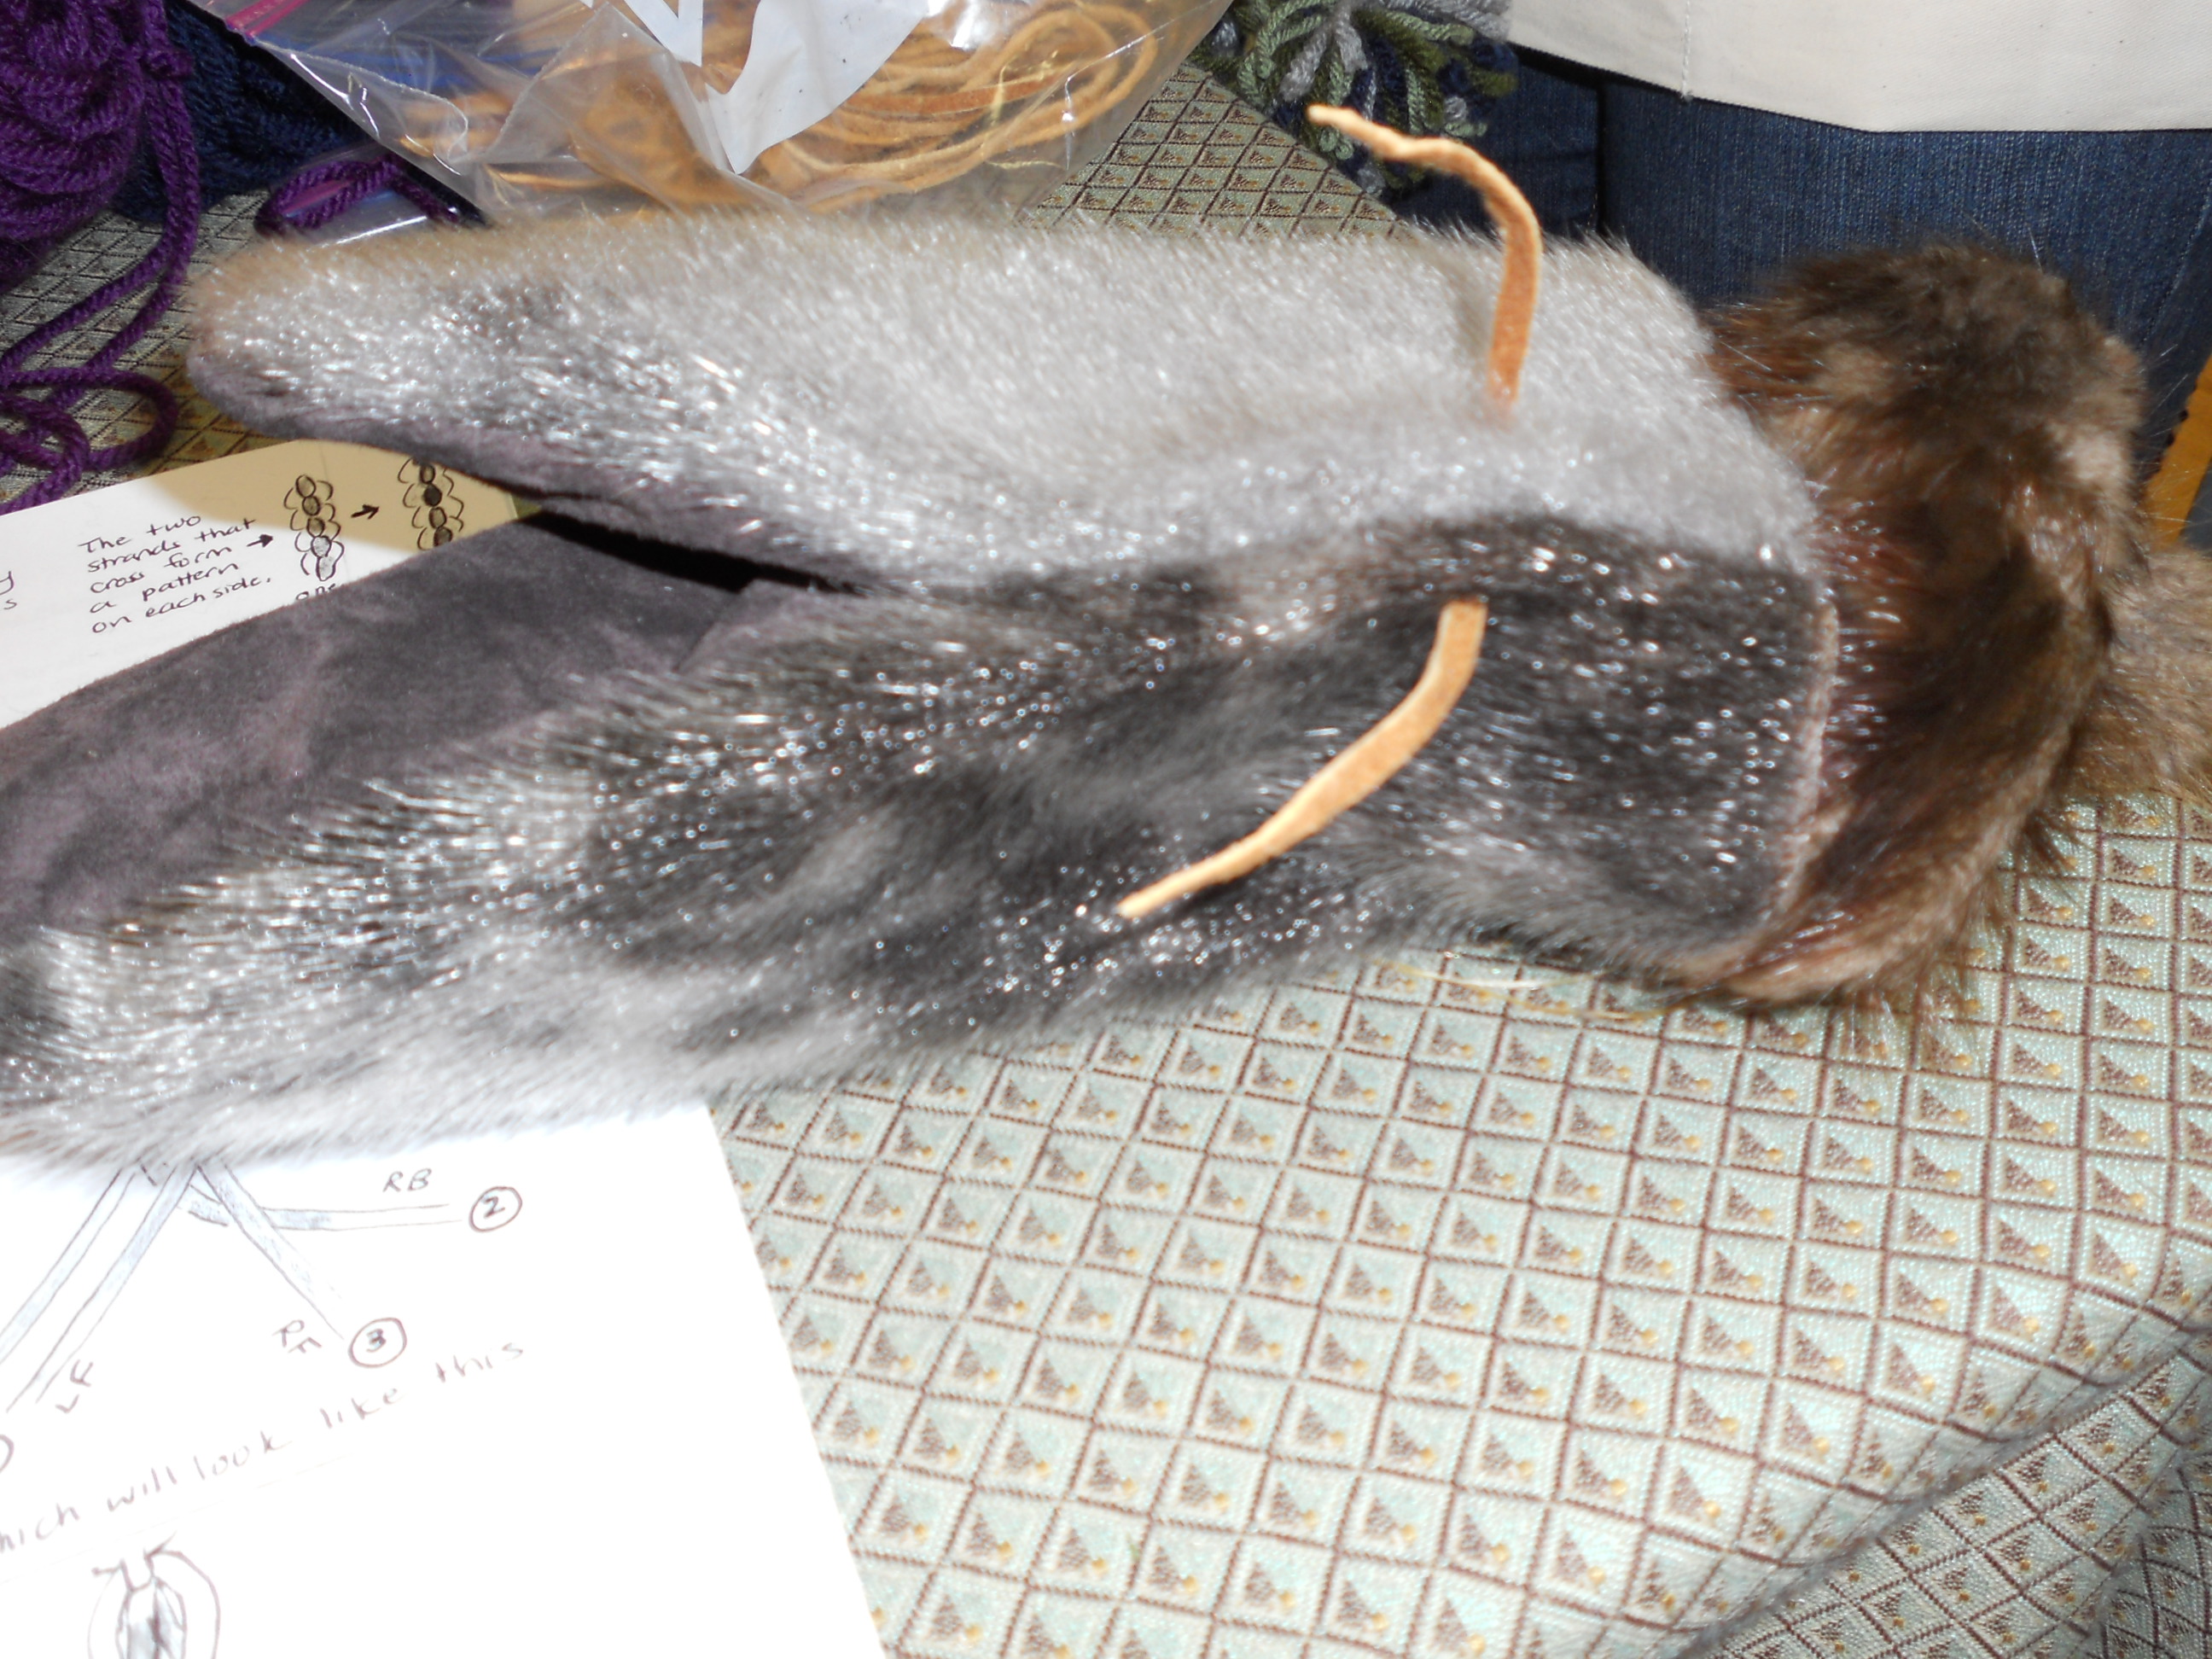
Sealskin mitten – almost done
I figured that since I was in, I might as well go all in, so I then signed up to learn how to make a mitten harness. This is braided yarn that is harnessed across the chest and back, with lengths on either side of the body that end at the wrist in loops, to which mittens are attached. The purpose of the harness is to keep the mittens close to the body if they have to be taken off in the cold. The loose part of the harness can also be twisted at one’s back, to put the mittens out of the way while working, yet easily accessible. It’s very practical, in a climate where the loss of a mitten might mean the loss of fingers. Additionally, we were told that if during winter we were to fall through the ice into the frigid lake, the harness could save us. If we were to throw a mitten out of the water, it would freeze and stick on the ice and the harness would be strong enough to support us pulling ourselves out. Falling into frigid water is something that I go to great lengths to avoid, so I don’t plan on testing the strength of my harness in that fashion.

Mitten harness yarn selected
To make the harness, we selected 4 different colours of wool, and measured double the length of our arm span for the strand that held the mittens, and 1.5 times the width of our chest for the harness portion. The braid was made with a 4-strand braiding technique, by which we crossed 2 colours each of yarn over the other 2 colours. All I’ll say is that it’s easier and faster to do it with a partner, so there are 4 hands. For decoration, we added pom-poms, which were remarkably simple to make. This is my finished harness. Take a good look at it, because if you ever see it lying near a hole in the ice, please summon the fire department right away.

Mitten harness – completed
To attach the mittens, we used an awl to punch a hole near the cuff and pulled a strip of animal hide through it. Every part of an animal has a use. We then tied the hide to the loop at the end of the harness.
Mitten attachment with animal hide
Now that I have learned how to sew hide with both long and short fur, I plan to buy some beaver fur to add to the hood of my coat, to keep the wintry cold off my face. If this winter will be anything like the last one, I will need it. I still have to finish the other mitten, and this winter I expect to add yet another pair of mittens to my collection, in my perpetual bid to keep my hands warm. After all of this work, that’s the very least that this pair ought to do.
Copyright © Kathryn Birchwood and FrozenTrini 2013. The use and/or duplication of this material without the express and written permission of this blog’s author and/or owner are unauthorised and strictly prohibited. Excerpts and links may be used, provided that full and clear credit is given to Kathryn Birchwood and FrozenTrini, with appropriate and specific direction to the original content.

Comments on: "Doing it the old-fashioned way" (5)
I hope you have had some adventures with your beautiful mittens and that you have not fallen in the ice!
LikeLike
Do you cut the fur with scissors?
LikeLike
No, it was too tough. It had to be cut with a very sharp knife to ensure accuracy. We used craft knives, which you can see on the right side of the first photo.
LikeLike
somehow the coming winter seems just a little more bearable…… :0)
LikeLike
Yes, “just a little” being the operative phrase. 🙂
LikeLike